

4 Steps to Underground Commercial Oil Tank Installation
When dealing with oil tanks, the processes are always very strict and regulated because oil is such a potentially harming substance. But handled the right way by the right professionals, oil tanks can be very simple to take care of. One important thing to remember with oil tanks is their life span. Underground oil tanks typically will last around 15 years of age before any wear or tear takes place that could potentially lead to an oil leak. For commercial land owners looking to replace old heating oil tanks, here are the important steps you will need to take:
Pre-Installation: Permits and Equipment
The pre-installation process involves getting a permit from the fire department, as well as inspecting all of the equipment and materials that will be used for the oil tank and to install the oil tank. There are lots of gauges and such on the oil tank to detect a potential leak, so these gauges must be inspected ahead of time to ensure their functionality. The fire department, as well as your company’s insurance company will both need to be very involved with the oil tank installation process. It’s important that every minute step is taken because punishments and leakages will cost a lot more.
Install Storage Tank
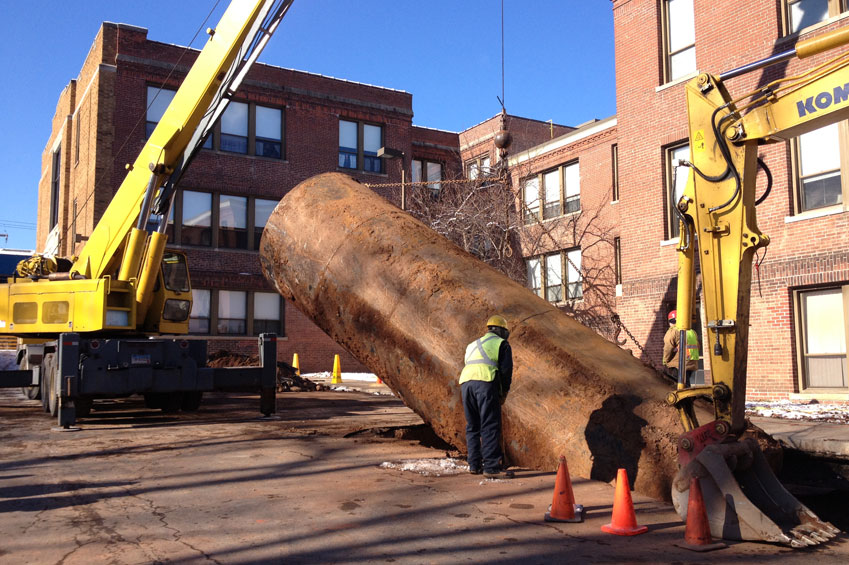
Once a permit has been granted and equipment has been tested, the underground storage tank can be installed. Nowadays these underground tanks are double-walled as an extra step of protection against oil leaks. After the oil tank is installed, tank supports will be installed to help keep the oil tank in one place and anchored to one exact spot.

Install Preventative Measures
Along with a permit, certain preventative measures need to be taken in order to complete oil tank installation. For example, careful precautions need to be taken when filling an underground oil tank so that there is no spillage or overfilling. An installed gauge will help determine how much oil you have put into your tank when first filling it, and filling it every winter thereafter. The fuel line also has to be installed. This, like the oil tank itself, is also double-walled to ensure there are no leaks.
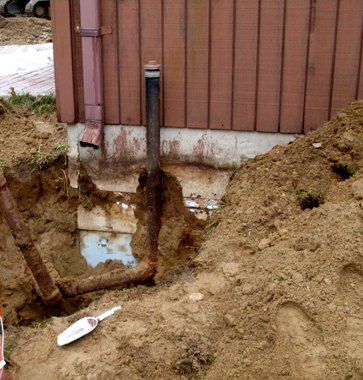
Install Vent Lines
Vent lines are the next part of the oil tank installation process. These vent lines will be buried, just as the oil tank itself is, however a steel vent riser will also be installed with a vent cap as well. As seen in the picture below, the vent line will rise up against the side of the building.
Testing Everything
Prior to using the newly installed oil tank, a decent amount of testing has to take place. The tank will be tested, as well as the secondary container, which will house the oil tank. The durability and thickness will again be measured and the oil tank will be given a satisfactory completion certificate by a licensed professional. Overfill protections and leak detectors will also be tested. Because the steps listed deal with an underground oil tank, replacing certain landscaping may also be part of the last step. It’s likely that grass and dirt may have to be dug up in order to install the tank, so if funds are available cover the spot back up as soon as you can.
Commercial oil tank installation is not an easy process, and it is absolutely not something that should be handled by a business owner themselves. Invest the money in a professional and install an oil tank the right way, so that legally and environmentally your business is safe. For any help regarding oil tank installation give us a call today at Tslack. Our trained professionals are ready and willing to answer any questions you may have.


